Category Archives: Software

How-to: Use Mercurial with EditPlus

I use EditPlus for most of my non-Visual Studio development. I’ve recently begun extending its functionality to use it as a “lite” PHP IDE by invoking php.exe from the commandline and capturing the output. I’ve also begun using Mercurial as my version control system of choice, and wondered if it would be possible to invoke hg from within EditPlus.

Turns out you can, and it’s quite easy. I find it best to configure Mercurial with an existing set of tools. I’m doing a lot of PHP right now, so that’s where I’ve stuck it.

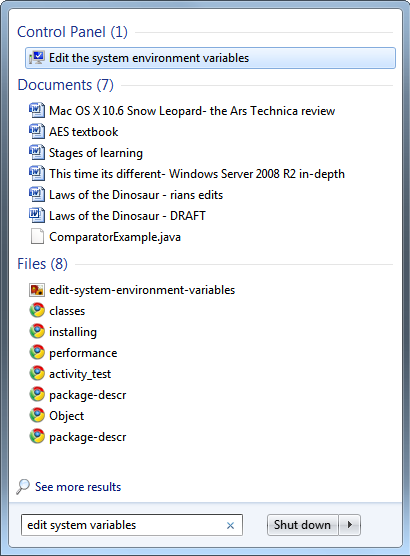
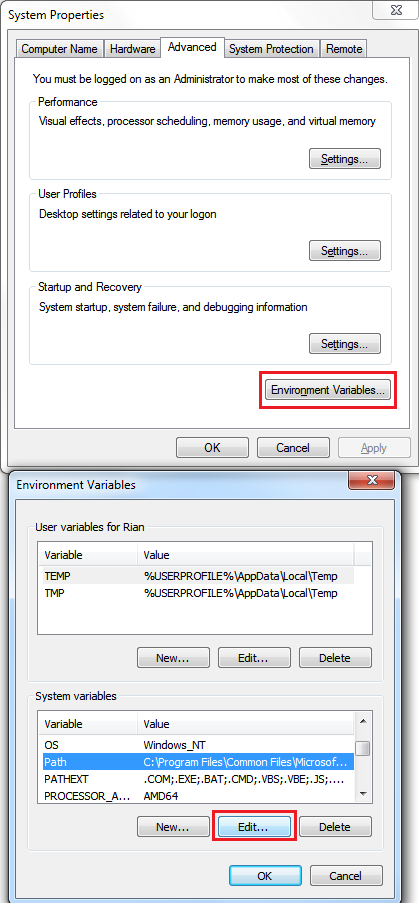
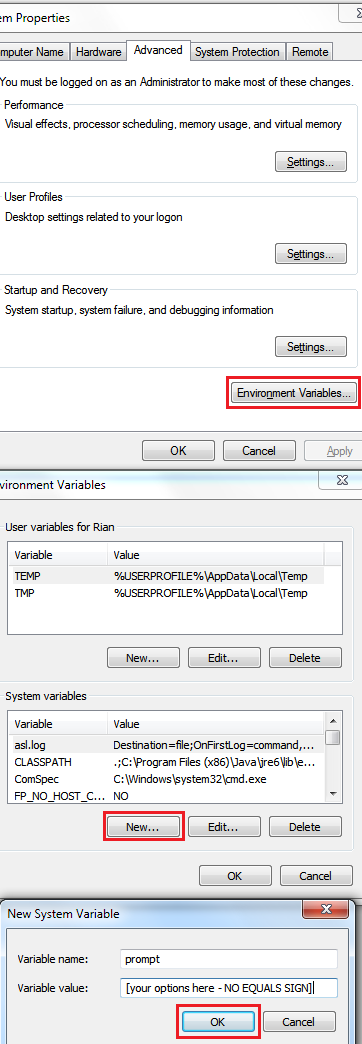
  1. Add Mercurial to your PATH Environment variable using the method I outlined in this post.
  2. In EditPlus, configure your user tools: Tools > Configure User Tools
  3. Add Tool > Program
    Add tool
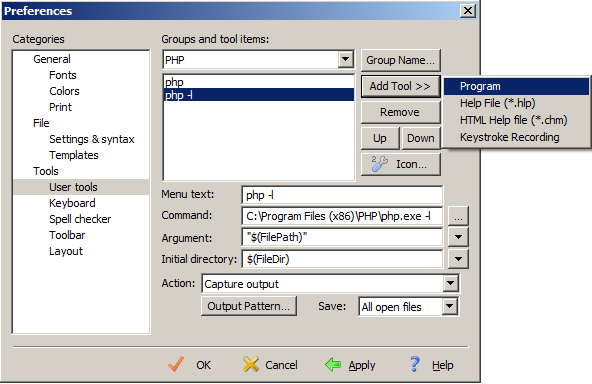
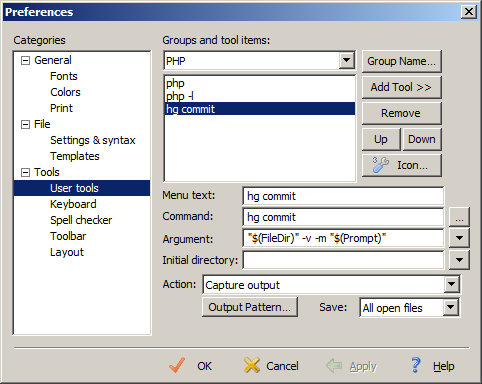
  4. Fill out the field as displayed, making modifications to suit your preferences:
    EditPlus Mercurial preferences

Details

  • "$(FileDir)" is the EditPlus variable indicating the directory that your current source file resides in. I have it enclosed in quotes, because sometimes directories or filenames have spaces in them.
  • -v indicates that I prefer verbose output. By default, mercurial will only display output if there has been an error, but I prefer to see success messages as well.
  • -m indicates a commit message.
  • "$(Prompt)" tells EditPlus to display a dialog that I can type in. This is where I put my commit message. I have it enclosed in quotes so I don’t have to worry about spaces breaking the commit message. You may need to escape more exotic characters; I have not tested it.

Caution

This method commits the working directory that your source file is in. This may or may not make sense, depending on the directory structure of your project. If you are concerned about the integrity of your atomic commits, it might make sense to configure your arguments differently, or to commit using the commandline or TortoiseHg.

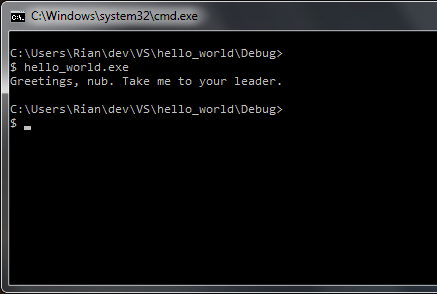
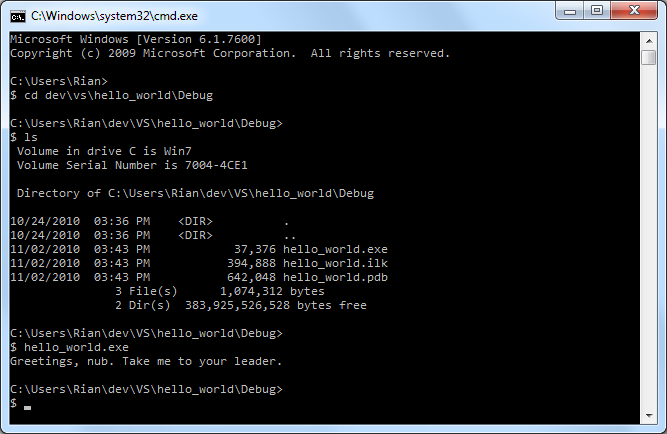
Here’s the output as I see it in my editor:
EditPlus mercurial output capture

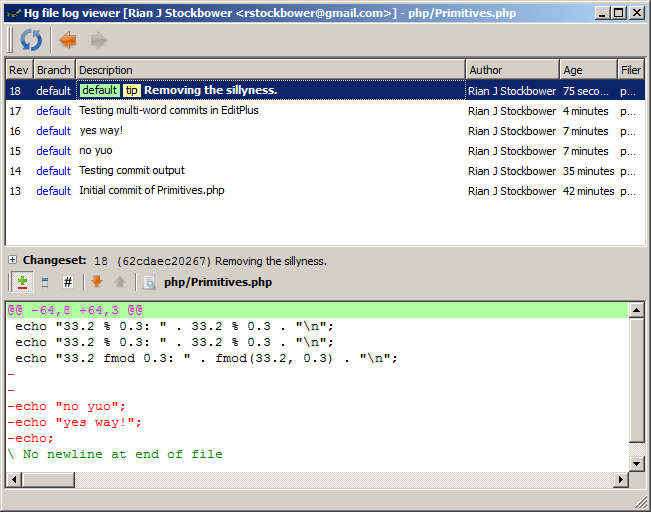
Here is a log of the commit messages as viewed with TortoiseHg:
EditPlus TortoiseHg log file viewer

How-To: Get your Olympus recorder working in Windows 7 and Vista

This article applies to the VN-120PC, VN-240PC, VN-480PC, VN-960PC, VN-2100PC, VN-3100PC, VN-3200PC and VN-4100PC digital audio recorders being used on 32- and 64-bit versions of Windows Vista and Windows 7.

The problem with getting your Olympus digital recorders to work with newer versions of Windows is that Olympus doesn’t provide all of the drivers you need in one place. In the hopes that I can save other frustrated users 20 minutes of wasted time, I’ve provided download links and a short guide to getting your recorder working with versions of Windows newer than XP.

1) Install the original Digital Wave Player software (Olympus link | local mirror)

Installing the original software will not get your device working, but it provides the baseline for the updates that you downloaded.

2) Install the Digital Wave Player update (Olympus link | local mirror)

This will make a green and gray digital recorder icon appear in your System Tray. (32-bit Windows users stop here.)

3) Install the 64-bit Windows drivers (Olympus link | local mirror)

After you’ve completed this step, you should be able to connect your device and transfer the audio files to your computer.


If you found this post useful, please consider donating $2


(Optional) Install Audacity to edit your audio files.

Link. Windows 7 users should use the 1.3 beta version.

How-to: Pin Eclipse to the Windows 7 taskbar

Before you begin, close any and all instances of Eclipse.

The Eclipse IDE for Java doesn’t come with an installer like most Windows packages do; it’s a zip file containing the program and the libraries it needs to run. As a result of this, and the fact that it’s written in Java, it has some non-standard behavior characteristics on its edges. One of them is the inability to pin the program to the taskbar like you can with most Windows programs. Another is the fact that when you tap the Windows key and type “eclipse”, eclipse.exe often doesn’t show up. (It might if you put it someplace besides %ProgramFiles% or %ProgramFiles(x86)%, I haven’t tested.)

No Eclipse in Windows search

I use the Windows 7 taskbar heavily, because I like being able to launch programs using Win+[number]. My desktop and laptop are configured identically, so Win+1 always opens Chrome, Win+5 is always iTunes. If you launch eclipse using Windows explorer, and then you try to “pin” the program to the taskbar, you discover that you can’t:

Can't pin Eclipse to taskbar

Well there’s a workaround. Buried in this bug report, you’ll discover that if you edit your environment variables, you’ll be able to pin eclipse to the taskbar. (You’ll need to be logged in as an Administrator):

Edit system environment variables

Edit Windows path variable Java

Add the path to the JRE to what’s currently there, followed by a semicolon. In my case, that would be:

C:\Program Files\Java\jre6\bin;

While you’re editing environment variables, it might not hurt to put in the path to the JDK, so if you ever decide to do Java development outside Eclipse, you don’t need to resort to setting the path by hand every time you launch the CLI. For me that’s “C:\Program Files\Java\jdk1.6.0_22\bin;” but it will change as newer versions of Java are released. If you do this, make sure you put the JDK path after the JRE path. For non-development purposes, you’ll generally want to be using the latest version of the JRE.

My new path looks like this:

C:\Program Files\Java\jre6\bin;C:\Program Files\Java\jdk1.6.0_22\bin;C:\Program Files\Common Files\Microsoft Shared\Windows Live;[etc]

Click OK, and launch Eclipse from explorer as you normally would. You should now be able to pin Eclipse to the taskbar, giving it a home among the rest of your permanently docked programs. Doing it this way means you won’t see two icons when Eclipse is open, which is what happens if you drag eclipse.exe to the taskbar without editing the system path.

Pin Eclipse to Windows taskbar

Gives you:

Eclipsed docked in the taskbar

3 ways to make the CLI (cmd.exe) more friendly

By default, cmd.exe isn’t especially friendly for most tasks, including basic things like copying and pasting text. Displaying long paths while still allowing you to see the commands you’re typing is even worse. Here are a few ways you can make the Windows shell less awful to work in.

Quick and easy stuff

First, the point-and-click options. Right click the bar, go down to Properties. Set the colors and font to whatever floats your boat. On the Options tab, and enable QuickEdit and Insert modes; this allows you to left click highlight/copy text, and right click to paste into the CLI window. (There’s a reason this isn’t enabled by default.)

On the Layout tab, increase the Screen Buffer Size to something more useful. Mine’s set to a height of 1000. If you want the CLI window to be larger or smaller, you can do that, too.

Getting fancier

By default, my fingers type ls when I want the contents of a directory. When I’m in bash, I generally have ls aliased to ls -l, which is pretty close to the standard Windows dir command, so I’ve edited my registry to do this every time cmd.exe is launched (download .reg 258 bytes):

[HKEY_LOCAL_MACHINE\SOFTWARE\Microsoft\Command Processor]
"AutoRun"="doskey ls=dir"

(You can also do this is HKEY_CURRENT_USER, if you’d prefer this to be a per-user setting.)

If you don’t have permission to edit your registry, or don’t want to, or would rather come up with a script-y way of doing things, the command is “doskey ls=dir”, so you can type this into the CLI whenever you want, or write a script to do this another way. You can also add in other commands, if you find your fingers typing grep instead of findstr, for example.

Icing on the cake

This next piece is, in my opinion, the single most useful thing you can do to make the shell friendlier, aside from enabling Insert and QuickEdit. Using the prompt command, you can alter the appearance of your shell prompt. For example, to get a Unix-like prompt, you can do this:

prompt=$p$_%username%@%computername%:

To get a Terminal.app style prompt, you can do this:

prompt=$p$_[%username%@%computername%]$$$s

As I’m the only user on this machine, and I’m really only interested in my current working directory, I go with a simpler:

prompt=$p$g$_$$$s

which gets me a prompt that looks like this:

My cmd prompt

Play around with the prompt command until you find a setting that you like. (Type “prompt” with no arguments to go back to the Windows default if you make a mistake.) Once you’ve found a setting you like, you can make the change permanent by editing your environment variables.

Tap the Windows key, type “environment variables”, and select “Edit the System Environment Variables”. (You’ll need to be logged in as an Administrator.)

edit system environment variables

Then do the following, entering your prompt options without the equals sign. Click OK and you’re finished!

Set prompt environment variable

The final results of the above look like this:

Final results